這幾個月以來,我們一直在利用 Angular 2 建構一個還不算小的入口網站,網站前端用的是 Angular 2 框架,後端用的是 ASP.NET Web API 2 框架,還好有 Angular 2 這樣一個優雅又完整的框架,讓我們整個前端團隊不分資深或資淺,大家都可以順利分工合作。如今網站即將上線,進入了要部署的時間點,原本在 Angular CLI 提供的開發伺服器上,程式都跑得好好的,但部署到 IIS 卻發生了網址路由的問題,除了首頁以外的頁面都會顯示 HTTP 404 Not Found 的錯誤,這該如何是好呢?本文告訴你如何解決!
第一種:不碰觸任何 IIS 設定的做法
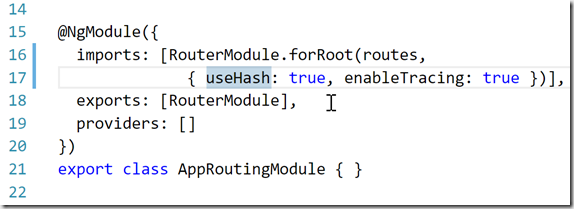
這種做法最簡單,直接修改你的 Angular 2 路由模組定義,將路由改用 useHash 的方式執行即可,如下圖示:
第二種:套用 URL Rewrite 自動網址重寫
首先,你必須先透過 Web Platform Installer 安裝 URL Rewrite 2.0 模組。
如果你的 IIS 只有很單純的安裝 Angular 2 網站,我已經寫好了一個 web.config 檔案,只要將該檔案複製到 IIS 網站根目錄即可。
<?xml version="1.0" encoding="UTF-8"?>
<configuration>
  <system.webServer>
    <rewrite>
      <rules>
        <rule name="SPA" stopProcessing="true">
          <match url=".*" />
          <action type="Rewrite" url="/" />
          <conditions>
            <add input="{REQUEST_FILENAME}" matchType="IsFile" negate="true" />
          </conditions>
        </rule>
      </rules>
    </rewrite>
  </system.webServer>
</configuration>
如果你想透過 IIS 管理員進行設定,也可以參照以下設定:
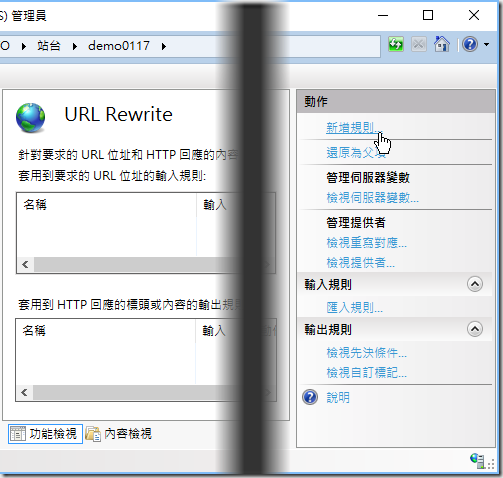
- 開啟 IIS 管理員,展開你的 Angular 2 站台,滑鼠雙擊 URL Rewrite 設定:

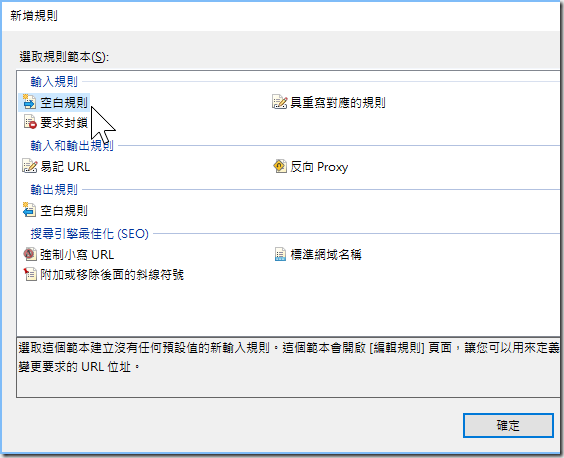
- 新增規則
- 新增空白規則
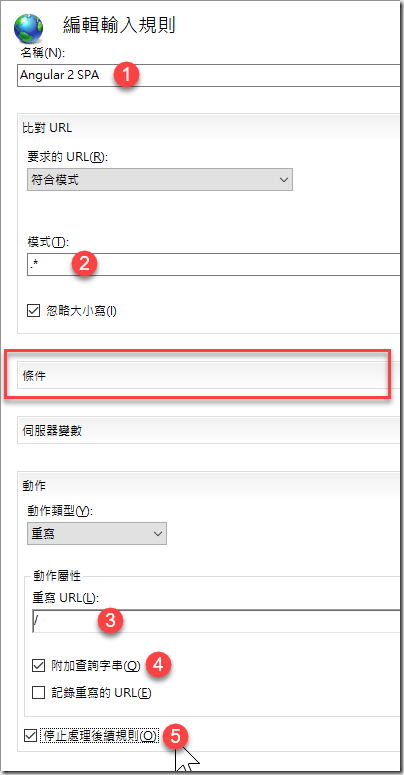
- 編輯輸入規格,請如下圖依序輸入完全一樣的設定,然後在下一步設定「條件」
- 新增條件
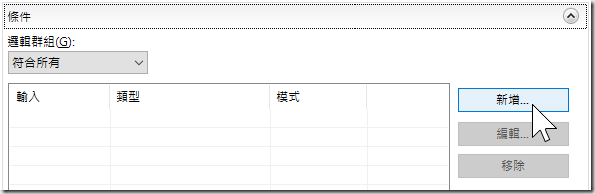
請設定「不是檔案」
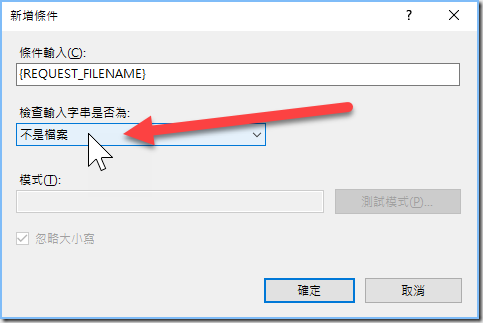
這裡的條件,最主要是要告訴 URL Rewrite 當用戶端要求的網頁在伺服器端找不到檔案時,自動改寫網址為 / 路徑。
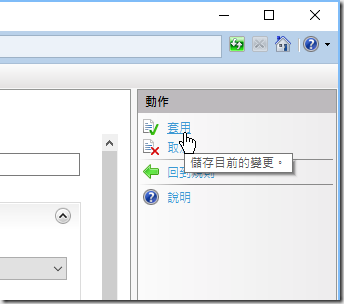
- 最後按下「套用」即可
第三種:同時部署 ASP.NET Web API 與 Angular 2 在同一站台的情況
上一種設定方式,最終會幫你在網站根目錄自動建立一個 web.config 設定檔,如果你的 Angular 2 已經跟你的 ASP.NET Web API 或 ASP.NET MVC 專案整合部署在同一個站台下的話,上述步驟則會自動幫你修改現有的 web.config 設定,但是上述設定會讓你的 ASP.NET Web API 完全無法使用,因為 ASP.NET MVC 與 ASP.NET Web API 本身就擁有 Routing 機制,URL Rewrite 模組的執行順序比 ASP.NET 的路由模組還早執行,URL Rewrite 的設定會大大影響著所有 ASP.NET 的路由設定。因此,你必須將 ASP.NET Web API 的 API 網址排除在 URL Rewrite 的設定之外,才可以讓 ASP.NET Web API 與 Angular 2 無縫接軌,這樣才能同時讓 Angular 2 與 ASP.NET Web API 在同一個 IIS 站台下運作!
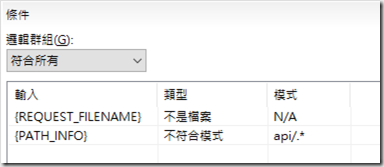
假設你的 ASP.NET Web API 路由都設定在 /api/ 路徑下,那麼請修改我們在上一步所做的「條件」設定,新增一筆規則,將「條件輸入」設定為 {PATH_INFO},將「檢查輸入字串是否為」設定為「不符合模式」,並在「模式」設定為 api/.* 即可 (設定模式時,請不要加上斜線開頭)。
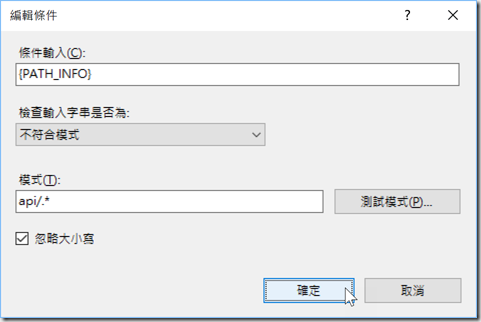
設定完後的條件示意圖如下:
相關連結