這幾年 Spring Boot 正夯,在 Java 界颳起一陣旋風,但他其實並沒有重新發明輪子,而是整合了一大堆好用的、現成的套件,然後設計一些簡潔的程式架構,搭配 IoC 與 AOP 大幅簡化開發的複雜度,也減少了許多繁瑣的設定步驟。今天這篇文章我不打算用 Spring Initializr 帶大家上手,而是完全手刻 Spring Boot 應用程式,從無到有解剖整個開發與啟動過程。

建立 Spring Boot 應用程式
以下步驟請在一個空資料夾進行操作。
-
建立一個 Apache Maven 所需的 pom.xml 檔案
<?xml version="1.0" encoding="UTF-8"?>
<project xmlns="http://maven.apache.org/POM/4.0.0" xmlns:xsi="http://www.w3.org/2001/XMLSchema-instance"
    xsi:schemaLocation="http://maven.apache.org/POM/4.0.0 https://maven.apache.org/xsd/maven-4.0.0.xsd">
    <modelVersion>4.0.0</modelVersion>

    <groupId>com.duotify</groupId>
    <artifactId>app1</artifactId>
    <version>0.0.1-SNAPSHOT</version>

    <parent>
        <groupId>org.springframework.boot</groupId>
        <artifactId>spring-boot-starter-parent</artifactId>
        <version>2.7.3</version>
    </parent>

    <!-- Additional lines to be added here... -->

</project>
直接執行 mvn package 就會自動產生一個 target/app1-0.0.1-SNAPSHOT.jar 檔案,不過這個檔案很小,只有 1.4KB 而已,目前沒有什麼實質內容,所以這個 jar 檔是沒有用的。
-
認識 Spring Boot 提供的 Parent POM 檔案
你從剛剛的 pom.xml 檔案可以看到以下 <parent> 片段,他明確的指定了一個名為 spring-boot-starter-parent 的 Parent POM 檔:
<parent>
    <groupId>org.springframework.boot</groupId>
    <artifactId>spring-boot-starter-parent</artifactId>
    <version>2.7.3</version>
</parent>
由於 Spring Boot 這套框架幫你整理了許多 Starters 套件,可以大幅簡化你在開發各種不同應用程式的時候的上手門檻。而這份 spring-boot-starter-parent POM 檔裡面,就定義了所有 Starters 套件的預設值。由於這些套件你不一定會用到,但是當你需要用到的時候,也不用花時間瞭解設定,因為 Spring Boot 已經全部幫你想好了,他把大多數人都會設定的屬性(Properties)、套件版本(version)、常用的 Plugins,全部都寫在這份 Parent POM 檔中,並自動繼承給你的 Spring Boot 專案。
你可以從以下路徑找到 spring-boot-starter-parent 這個 POM 檔,建議大家自己打開來看看裡面的內容:
~/.m2/repository/org/springframework/boot/spring-boot-starter-parent/2.7.3/spring-boot-starter-parent-2.7.3.pom
注意: 所有 Starters 套件的 groupId 都是 org.springframework.boot
-
加入 Classpath 套件相依性
由於 Spring Boot 就是一個 Java 應用程式,應用程式所需參考到的那些 JARs 檔,其實完全可以透過 Maven 或 Gradle 來進行管裡。我以 Maven 為例,我們的 spring-boot-starter-parent 這個 POM 檔,透過 Dependency Management 機制,幫你預先定義好了會用到的相依套件,並且也幫你指定好了版本資訊。所以在你專案下的 pom.xml 其實是不需要指定 <version> 版本資訊的,直接使用 groupId 與 <artifactId> 就可以順利的載入相依套件。
當然,這只是 Maven 的繼承效果,如果你想要自己決定想採用的版本,還是可以加上 <version> 元素來指定版本。不過你最好思考一下為什麼要這麼做?因為如果你未來想要將 Spring Boot 升級版本時,只要調整一下 spring-boot-starter-parent 這個 Parent POM 的版本,所有「測試過的」相依套件就會一併升級到沒問題的版本,自己指定套件版本反而是有升級風險的。
我們可以利用 mvn dependency:tree 查看專案的套件相依資訊:
mvn dependency:tree
此時你只會看到一個 com.duotify:app1:jar:0.0.1-SNAPSHOT 套件 (就是目前專案) 而已,因為我們並沒有在 pom.xml 宣告使用任何相依套件:
[INFO] com.duotify:app1:jar:0.0.1-SNAPSHOT
如果你要用 Spring 來開發 Web 的話 (包含 MVC 或 API 開發),只要加入 spring-boot-starter-web 這個 Starters 相依套件到 pom.xml 之中即可:
<dependencies>
    <dependency>
        <groupId>org.springframework.boot</groupId>
        <artifactId>spring-boot-starter-web</artifactId>
    </dependency>
</dependencies>
請記得不要加上 <version> 元素,直接繼承使用 Parent POM 定義的版本才是最佳實務(Best Practices)。
加完之後的 pom.xml 檔案內容如下:
<?xml version="1.0" encoding="UTF-8"?>
<project xmlns="http://maven.apache.org/POM/4.0.0" xmlns:xsi="http://www.w3.org/2001/XMLSchema-instance" xsi:schemaLocation="http://maven.apache.org/POM/4.0.0 https://maven.apache.org/xsd/maven-4.0.0.xsd">
    <modelVersion>4.0.0</modelVersion>

    <groupId>com.duotify</groupId>
    <artifactId>app1</artifactId>
    <version>0.0.1-SNAPSHOT</version>

    <parent>
        <groupId>org.springframework.boot</groupId>
        <artifactId>spring-boot-starter-parent</artifactId>
        <version>2.7.3</version>
    </parent>

    <!-- Additional lines to be added here... -->
    <dependencies>
        <dependency>
            <groupId>org.springframework.boot</groupId>
            <artifactId>spring-boot-starter-web</artifactId>
        </dependency>
    </dependencies>

</project>
我們再執行一次 mvn dependency:tree 查看專案的套件相依資訊,就會非常多了:
[INFO] com.duotify:app1:jar:0.0.1-SNAPSHOT
[INFO] \- org.springframework.boot:spring-boot-starter-web:jar:2.7.3:compile
[INFO]    +- org.springframework.boot:spring-boot-starter:jar:2.7.3:compile
[INFO]    |  +- org.springframework.boot:spring-boot:jar:2.7.3:compile
[INFO]    |  +- org.springframework.boot:spring-boot-autoconfigure:jar:2.7.3:compile
[INFO]    |  +- org.springframework.boot:spring-boot-starter-logging:jar:2.7.3:compile
[INFO]    |  |  +- ch.qos.logback:logback-classic:jar:1.2.11:compile
[INFO]    |  |  |  +- ch.qos.logback:logback-core:jar:1.2.11:compile
[INFO]    |  |  |  \- org.slf4j:slf4j-api:jar:1.7.36:compile
[INFO]    |  |  +- org.apache.logging.log4j:log4j-to-slf4j:jar:2.17.2:compile
[INFO]    |  |  |  \- org.apache.logging.log4j:log4j-api:jar:2.17.2:compile
[INFO]    |  |  \- org.slf4j:jul-to-slf4j:jar:1.7.36:compile
[INFO]    |  +- jakarta.annotation:jakarta.annotation-api:jar:1.3.5:compile
[INFO]    |  +- org.springframework:spring-core:jar:5.3.22:compile
[INFO]    |  |  \- org.springframework:spring-jcl:jar:5.3.22:compile
[INFO]    |  \- org.yaml:snakeyaml:jar:1.30:compile
[INFO]    +- org.springframework.boot:spring-boot-starter-json:jar:2.7.3:compile
[INFO]    |  +- com.fasterxml.jackson.core:jackson-databind:jar:2.13.3:compile
[INFO]    |  |  +- com.fasterxml.jackson.core:jackson-annotations:jar:2.13.3:compile
[INFO]    |  |  \- com.fasterxml.jackson.core:jackson-core:jar:2.13.3:compile
[INFO]    |  +- com.fasterxml.jackson.datatype:jackson-datatype-jdk8:jar:2.13.3:compile
[INFO]    |  +- com.fasterxml.jackson.datatype:jackson-datatype-jsr310:jar:2.13.3:compile
[INFO]    |  \- com.fasterxml.jackson.module:jackson-module-parameter-names:jar:2.13.3:compile
[INFO]    +- org.springframework.boot:spring-boot-starter-tomcat:jar:2.7.3:compile
[INFO]    |  +- org.apache.tomcat.embed:tomcat-embed-core:jar:9.0.65:compile
[INFO]    |  +- org.apache.tomcat.embed:tomcat-embed-el:jar:9.0.65:compile
[INFO]    |  \- org.apache.tomcat.embed:tomcat-embed-websocket:jar:9.0.65:compile
[INFO]    +- org.springframework:spring-web:jar:5.3.22:compile
[INFO]    |  \- org.springframework:spring-beans:jar:5.3.22:compile
[INFO]    \- org.springframework:spring-webmvc:jar:5.3.22:compile
[INFO]       +- org.springframework:spring-aop:jar:5.3.22:compile
[INFO]       +- org.springframework:spring-context:jar:5.3.22:compile
[INFO]       \- org.springframework:spring-expression:jar:5.3.22:compile
-
撰寫你的第一支 Java 程式
建立 src/main/java/com/duotify/app1/MyApplication.java 檔案
package com.duotify.app1;

import org.springframework.boot.SpringApplication;
import org.springframework.boot.autoconfigure.EnableAutoConfiguration;
import org.springframework.web.bind.annotation.RequestMapping;
import org.springframework.web.bind.annotation.RestController;

@RestController
@EnableAutoConfiguration
public class MyApplication {

    @RequestMapping("/")
    String home() {
        return "Hello World!";
    }

    public static void main(String[] args) {
        SpringApplication.run(MyApplication.class, args);
    }

}
類別上的 @RestController 標注 (Annotations),在 Spring 裡面又被稱為是一種 Stereotype Annotations (刻板印象標注)。其主要目的是提高程式碼的可讀性,讓開發人員看到 @RestController 標注,就會一目了然的知道這個類別其實就是一個支援 REST 功能的 Controller (控制器)。由於這樣的設計會讓開發人員自動形成一種刻板印象(Stereotype),看到這類標注就會自動識別這個類別的角色與用途,這是我認為他用 Stereotype 這個單字的主因。
除此之外,Stereotype Annotations (刻板印象標注) 還有另一個目的,則是賦予「類別」一個角色,好讓 Spring Framework 可以透過 Component scanning 快速的找到相對應的服務。Spring 內建的 Stereotype Annotations 可以從 org.springframework.stereotype (Spring Framework 5.3.23 API) 查閱,基本上所有的 Stereotype Annotations 都會繼承自 org.springframework.stereotype.Component (@Component) 型別。
類別上的 @EnableAutoConfiguration 標注 (Annotations) 則會讓 Spring Boot 自動找出所有相依套件中 JAR 檔的類別,並自動建立與註冊成 Spring Beans 元件,好讓 Spring Boot 可以在需要的時候使用這些可重複利用這些的 Spring Beans 元件。例如 Tomcat 或 Spring MVC 等等。
在 home() 方法上的 @RequestMapping("/") 則是定義控制器的路由,決定網址的結構。
-
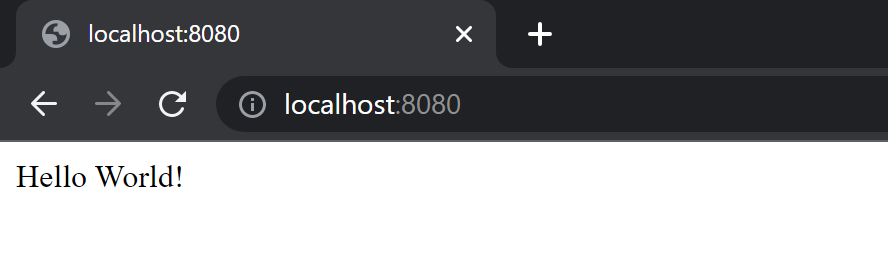
啟動 Spring Boot 網站
mvn spring-boot:run
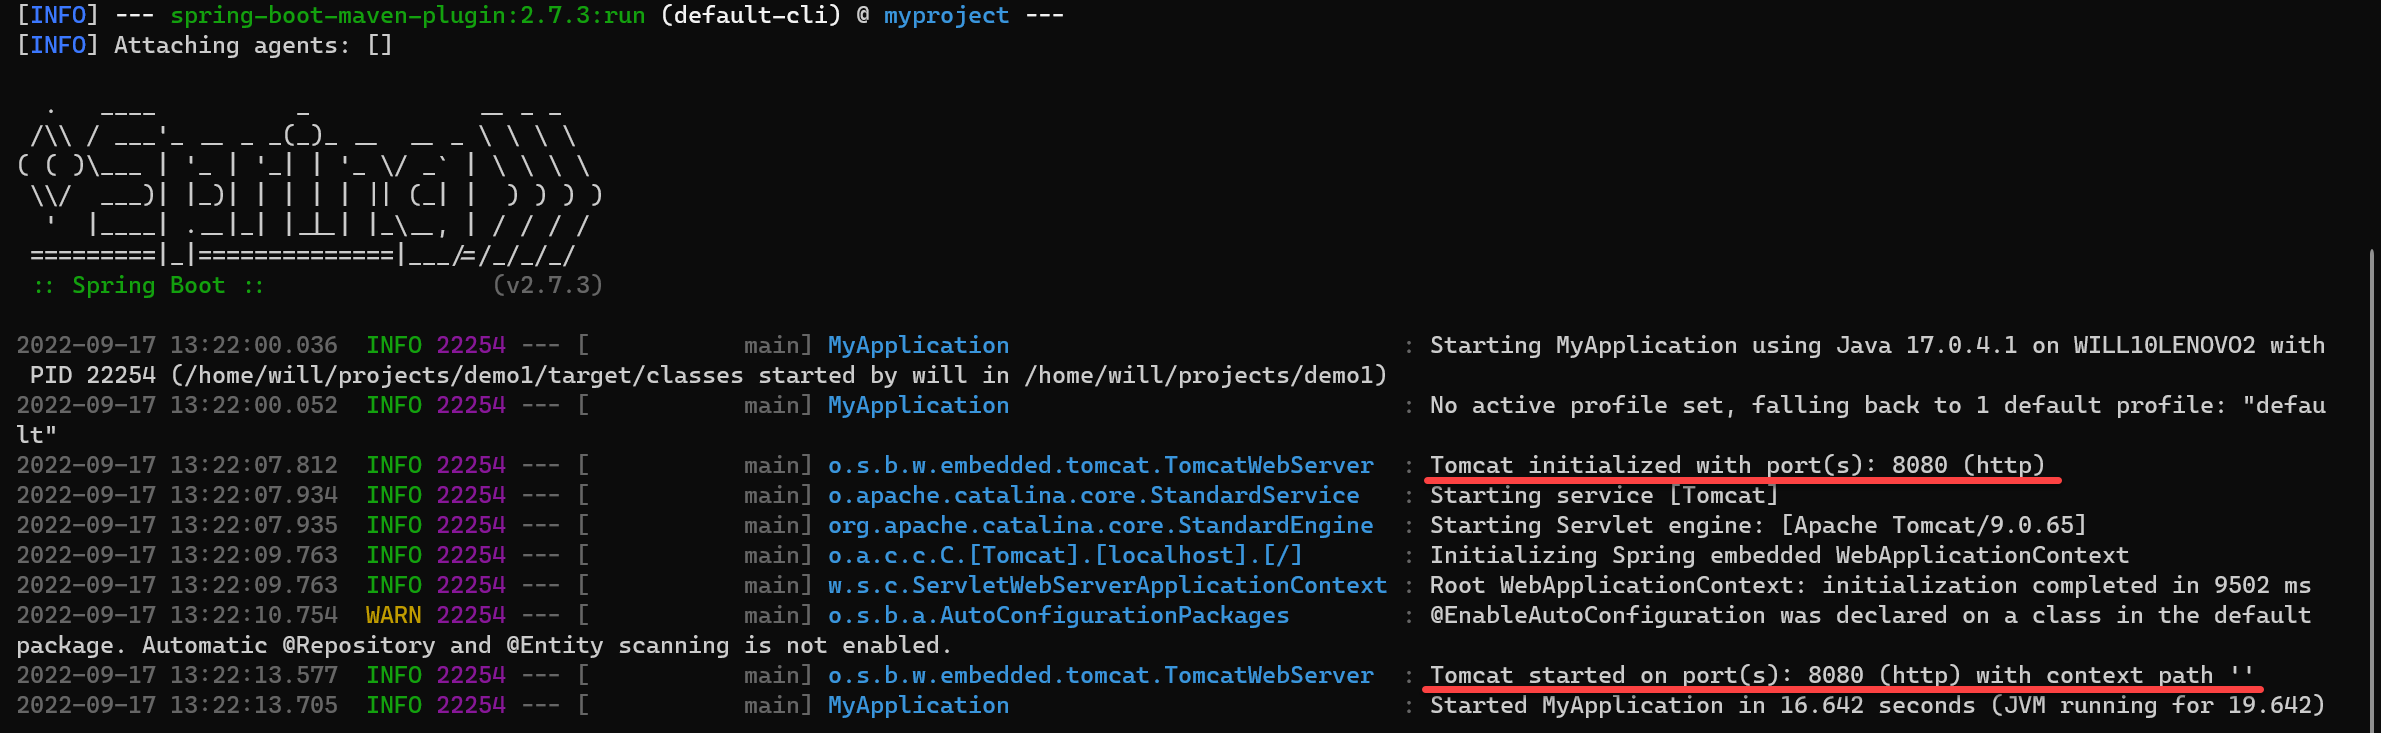
透過瀏覽器開啟 http://localhost:8080/ 即可看到網站!
-
將應用程式打包成 *.jar 檔
如果你現在執行 mvn package 嘗試封裝 target/app1-0.0.1-SNAPSHOT.jar 檔案,不過這個檔案依然很小,只有 2.4KB 而已,本身並沒有包含 Tomcat 之類的套件,所以他還無法成為一個可以獨立運作的執行檔。
其實 Java 並沒有提供一種稱為 Nested JAR 的封裝方式,也就是在一個 JAR 檔裡面包含其他需要用到的 JAR 檔。所以如果你要部署一個包含相依套件的應用程式,就會需要部署好幾個檔案,使用上較為不便。如果我們想要發佈一個自我包含所有 JAR 檔的 JAR 可執行檔(self-contained executable jar file),通常大家會把應用程式打包成俗稱 ÜBER JAR 或 FAT JAR 的格式。詳見 The Executable Jar Format 文件說明。
這個應用程式封裝打包的需求,有個 spring-boot-maven-plugin plugin 可以幫助我們達成目的,你只要在專案的 pom.xml 加入以下設定即可:
<build>
    <plugins>
        <plugin>
            <groupId>org.springframework.boot</groupId>
            <artifactId>spring-boot-maven-plugin</artifactId>
        </plugin>
    </plugins>
</build>
加完之後的 pom.xml 檔案內容如下:
<?xml version="1.0" encoding="UTF-8"?>
<project xmlns="http://maven.apache.org/POM/4.0.0" xmlns:xsi="http://www.w3.org/2001/XMLSchema-instance" xsi:schemaLocation="http://maven.apache.org/POM/4.0.0 https://maven.apache.org/xsd/maven-4.0.0.xsd">
    <modelVersion>4.0.0</modelVersion>

    <groupId>com.duotify</groupId>
    <artifactId>app1</artifactId>
    <version>0.0.1-SNAPSHOT</version>

    <parent>
        <groupId>org.springframework.boot</groupId>
        <artifactId>spring-boot-starter-parent</artifactId>
        <version>2.7.3</version>
    </parent>

    <!-- Additional lines to be added here... -->
    <dependencies>
        <dependency>
            <groupId>org.springframework.boot</groupId>
            <artifactId>spring-boot-starter-web</artifactId>
        </dependency>
    </dependencies>

    <build>
        <plugins>
            <plugin>
                <groupId>org.springframework.boot</groupId>
                <artifactId>spring-boot-maven-plugin</artifactId>
            </plugin>
        </plugins>
    </build>

</project>
理論上 spring-boot-maven-plugin plugin 設定沒有這麼少,因為你還有 <executions> 與 <configuration> 需要設定才對。但是 Spring Boot 提供的 Parent POM 已經幫你設定了這些內容,所以才會看起來這麼簡單!
這個 spring-boot-maven-plugin plugin 完整的設定內容如下(從 spring-boot-starter-parent 這個 POM 取出):
<plugin>
  <groupId>org.springframework.boot</groupId>
  <artifactId>spring-boot-maven-plugin</artifactId>
  <executions>
    <execution>
      <id>repackage</id>
      <goals>
        <goal>repackage</goal>
      </goals>
    </execution>
  </executions>
  <configuration>
    <mainClass>${start-class}</mainClass>
  </configuration>
</plugin>
執行 mvn package 封裝 target/app1-0.0.1-SNAPSHOT.jar 檔案,這個時候檔案大小就有 16.8MB 了,本身包含了 Tomcat 套件,而且可以獨立運作執行。
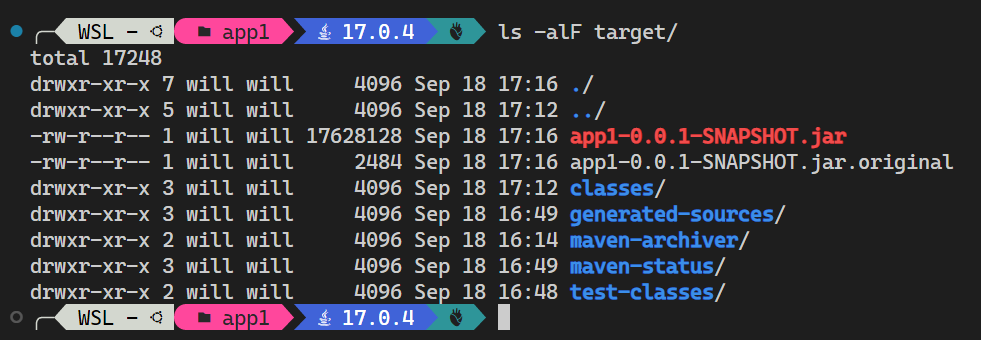
上圖的 app1-0.0.1-SNAPSHOT.jar.original 是你應用程式原始的 JAR 檔,他因為被 spring-boot-maven-plugin 執行過 repackage 目標(Goal),所以才在執行重新封裝(repackage)時加入了 Tomcat 進去。
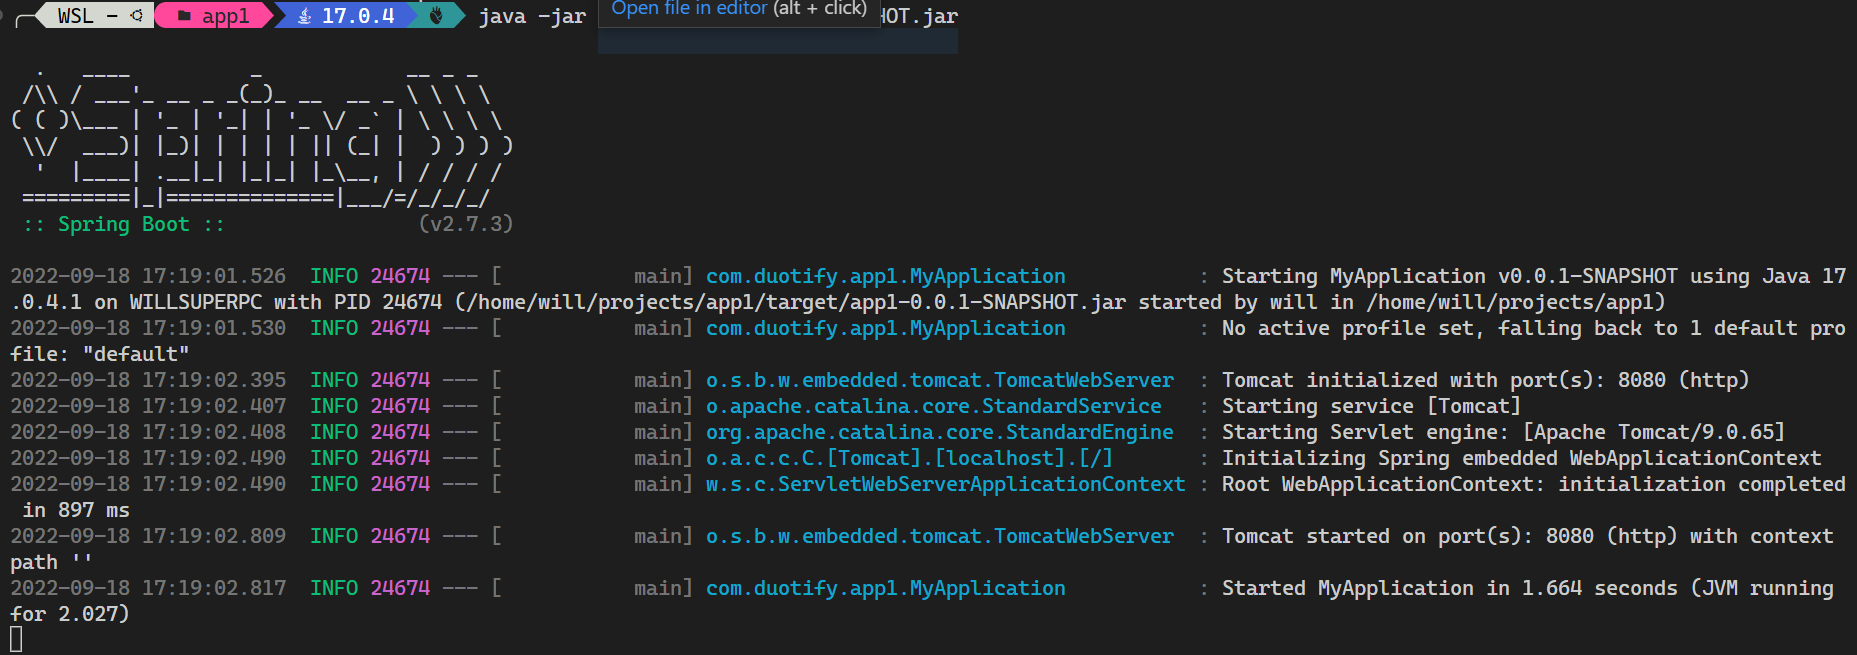
最後執行 java -jar target/app1-0.0.1-SNAPSHOT.jar 就可以發現你的 Spring Boot 應用程式可以順利執行並啟動了!👍
總結
Spring Boot 提供一套簡潔的架構,方便你可以快速完成任務,但是神奇的架構背後,其實有很多值得探討的地方,當你抽絲剝繭釐清了背後的原理之後,才有辦法舉一反三,幫助你思考,進而在正確的時間點做出正確的技術決策。
相關連結