最近一直在弄客戶網站上線前的準備事項,我們在進行前端效能調校時,當然不免俗的要用 Lighthouse (GitHub) 跑一遍,結果發現除了效能殺手 Google Fonts 無解外,另一個主要的效能殺手就是沒有經過優化的圖片,畢竟圖片都是從後台上稿的,如果沒有好好的處理,是有可能會影響到用戶體驗的。今天我就來介紹一套我用很久的 Squoosh.app 網站與 Squoosh CLI 命令列工具。
簡介 Squoosh
Squoosh 是一個由 Google 開發的圖片壓縮工具,它可以幫助你快速而有效地壓縮圖片,以減小文件大小,提高網頁載入速度,同時保持圖片品質。這個工具特別適合網頁開發者和設計師,因為它提供了許多高度自定義的壓縮選項,讓你根據需要調整圖片壓縮細節。
Squoosh 提供直觀的用戶界面,使你可以輕鬆拖放圖片,也可以透過剪貼簿直接貼上圖片,然後即時預覽圖片壓縮後的效果。它支持多種常見的圖片格式,包括 JPEG、PNG、WebP、AVIF 等,並且可以在不同壓縮品質設定之間進行比較,以找到最佳的平衡點。
除了基本的壓縮功能,Squoosh 還提供了先進的選項,例如圖像縮放、旋轉、色彩配置和濾鏡應用,這些功能使你能夠在不犧牲品質品質的情況下減小文件大小。此外,Squoosh 還可以產生用於不同螢幕和設備的圖片變體,以確保最佳的視覺效果。
總之,Squoosh 是一個強大且易於使用的圖片壓縮工具,對於優化網頁性能和節省頻寬的開發者來說,它是一個不可或缺的工具。

因為 Squoosh 本身就很容易上手,如果你想要學習如何使用,可以參考以下幾篇文章與影片:
對了,這套 Squoosh 甚至是一套開放原始碼專案!👍
簡介 Squoosh CLI
有鑑於 Squoosh 的功能強大,圖片壓縮的編碼器也非常多,因此 Google 便將 Squoosh 的核心編碼器抽離出來 (libSquoosh),並且用 Node.js 與 WebAssembly 技術將它打包成一個獨立的、跨平台的命令列工具,稱為 Squoosh CLI!
不過很可惜,這個 Squoosh CLI 專案已經在 10 個月前就被 Google 放棄了 (可能跟年初的大裁員有關):
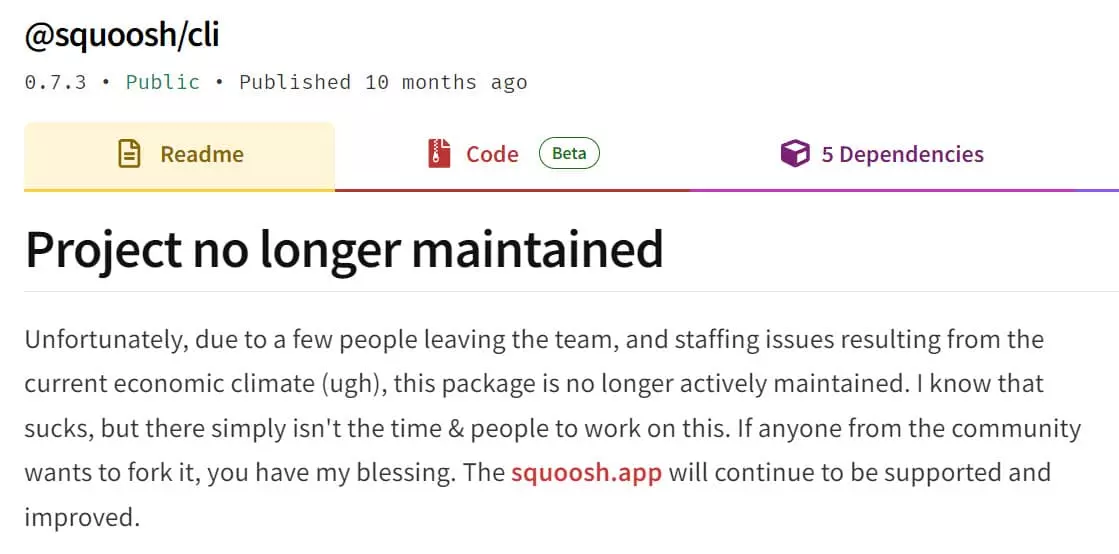
不止這樣,我發現在 GoogleChromeLabs/squoosh 的 dev 分支也已經沒有這個 Squoosh CLI 原始碼了,連個 Tag 或 Branch 都不留,所以我自己 Fork 了一份在這裡,你可以從我的 GitHub Repo 找到被移除的所有原始碼:https://github.com/doggy8088/squoosh/tree/cli
由於 Squoosh CLI 本身是一個 Node.js 的命令列工具,因此你可以透過 npm 來安裝它:
npm install -g @squoosh/cli
Squoosh CLI 在 Linux 與 macOS 執行時都可以跑得蠻順暢的,只是執行時經常會出現一些討厭的警告訊息:
(node:6200) MaxListenersExceededWarning: Possible EventEmitter memory leak detected. 17 unpipe listeners added to [WriteStream]. Use emitter.setMaxListeners() to increase limit
(Use `node --trace-warnings ...` to show where the warning was created)
(node:6200) MaxListenersExceededWarning: Possible EventEmitter memory leak detected. 17 error listeners added to [WriteStream]. Use emitter.setMaxListeners() to increase limit
(node:6200) MaxListenersExceededWarning: Possible EventEmitter memory leak detected. 17 close listeners added to [WriteStream]. Use emitter.setMaxListeners() to increase limit
(node:6200) MaxListenersExceededWarning: Possible EventEmitter memory leak detected. 17 finish listeners added to [WriteStream]. Use emitter.setMaxListeners() to increase limit
要過濾掉這些訊息,只要設定一個 NODE_NO_WARNINGS 環境變數即可,如下設定:
export NODE_NO_WARNINGS=1
不過 Squoosh CLI 對 Windows 平台似乎不太友善,執行時會出現以下錯誤:
node:internal/deps/undici/undici:11457
    Error.captureStackTrace(err, this);
          ^

TypeError: fetch failed
    at Object.fetch (node:internal/deps/undici/undici:11457:11) {
  cause: Error: unknown scheme
      at makeNetworkError (node:internal/deps/undici/undici:6802:35)
      at schemeFetch (node:internal/deps/undici/undici:10919:18)
      at node:internal/deps/undici/undici:10792:26
      at mainFetch (node:internal/deps/undici/undici:10809:11)
      at fetching (node:internal/deps/undici/undici:10766:7)
      at fetch2 (node:internal/deps/undici/undici:10644:20)
      at Object.fetch (node:internal/deps/undici/undici:11455:18)
      at fetch (node:internal/process/pre_execution:230:25)
      at instantiateAsync (C:\Users\User\AppData\Roaming\npm\node_modules\@squoosh\cli\node_modules\@squoosh\lib\build\index.js:28:11469)
      at createWasm (C:\Users\User\AppData\Roaming\npm\node_modules\@squoosh\cli\node_modules\@squoosh\lib\build\index.js:28:12079) {
    [cause]: undefined
  }
}

Node.js v18.16.0
為了解決這個問題,我還特別替他開發了一套 Docker 映像檔,讓 Windows 用戶可以透過 Docker 更好的使用這套工具,你可以從 Docker Hub 的 willh/squoosh-cli 專案找到我的映像檔,我的 Dockerfile 與相關檔案也開源在我的 GitHub 帳號下,你可以到 doggy8088/docker-squoosh-cli 找到我的原始碼。
基本用法如下:
-
先拉 image 回來
docker pull willh/squoosh-cli
-
查詢基本用法
這個命令有用到 ${PWD} 變數,你只能在 PowerShell 或 Bash 環境下才能用,千萬不要用 Command Prompt (cmd.exe) 來執行這個命令。
docker run --rm -it -v ${PWD}:/data willh/squoosh-cli -h
基本用法如下:
Usage: squoosh-cli [options] <files...>

Options:
  -d, --output-dir <dir>                                 Output directory (default: ".")
  -s, --suffix <suffix>                                  Append suffix to output files (default: "")
  --max-optimizer-rounds <rounds>                        Maximum number of compressions to use for auto optimizations (default: "6")
  --optimizer-butteraugli-target <butteraugli distance>  Target Butteraugli distance for auto optimizer (default: "1.4")
  --resize [config]                                      Resize the image before compressing
  --quant [config]                                       Reduce the number of colors used (aka. paletting)
  --rotate [config]                                      Rotate image
  --mozjpeg [config]                                     Use MozJPEG to generate a .jpg file with the given configuration
  --webp [config]                                        Use WebP to generate a .webp file with the given configuration
  --avif [config]                                        Use AVIF to generate a .avif file with the given configuration
  --jxl [config]                                         Use JPEG-XL to generate a .jxl file with the given configuration
  --wp2 [config]                                         Use WebP2 to generate a .wp2 file with the given configuration
  --oxipng [config]                                      Use OxiPNG to generate a .png file with the given configuration
  -h, --help                                             display help for command
-
將圖片壓縮後並轉成 WebP 格式
以下命令會將 image.png 壓縮後 (品質維持在 80% 左右),產生一個 image.webp 檔案,並且放在 out 子目錄下。
docker run --rm -it -v ${PWD}:/data willh/squoosh-cli --webp '{quality:80}' -d 'out' image.png
若沒有加上 -d 參數,預設會覆蓋原本的檔案。
你也可以將圖片轉成 MozJPEG 格式,參數的 [config] 可以用很簡單的 {} 代表全部使用預設值:
docker run --rm -it -v ${PWD}:/data willh/squoosh-cli --mozjpeg '{}' -d 'out' image.png
我的 Docker 容器還支援用「萬用字元」來批次轉換大量圖檔:
docker run --rm -it -v ${PWD}:/data willh/squoosh-cli --mozjpeg '{}' -d 'out' *.png
這套 Squoosh CLI 最大的弊病,就是完全沒有說明文件,而且 squoosh-cli -h 顯示的說明也非常不清楚,像是 [config] 要寫什麼就完全沒說,只能自己從原始碼中找答案,我有看到網路上一堆人都在瞎猜各種參數,很多都是錯誤的。
我趁著假日把所有參數都釐清了,以下的參數說明是全世界最完整的參數與選項使用說明了,我真的找不到有誰整理的比我還清楚,哈!XD
以下就是我從 Squoosh CLI 的原始碼中抽絲剝繭出來的所有參數說明:
-
MozJPEG (--mozjpeg [config])
{
  quality: 75,
  baseline: false,
  arithmetic: false,
  progressive: true,
  optimize_coding: true,
  smoothing: 0,
  color_space: MozJpegColorSpace.YCbCr,
  quant_table: 3,
  trellis_multipass: false,
  trellis_opt_zero: false,
  trellis_opt_table: false,
  trellis_loops: 1,
  auto_subsample: true,
  chroma_subsample: 2,
  separate_chroma_quality: false,
  chroma_quality: 75,
}
-
WebP (--webp [config])
{
  quality: 75,
  target_size: 0,
  target_PSNR: 0,
  method: 4,
  sns_strength: 50,
  filter_strength: 60,
  filter_sharpness: 0,
  filter_type: 1,
  partitions: 0,
  segments: 4,
  pass: 1,
  show_compressed: 0,
  preprocessing: 0,
  autofilter: 0,
  partition_limit: 0,
  alpha_compression: 1,
  alpha_filtering: 1,
  alpha_quality: 100,
  lossless: 0,
  exact: 0,
  image_hint: 0,
  emulate_jpeg_size: 0,
  thread_level: 0,
  low_memory: 0,
  near_lossless: 100,
  use_delta_palette: 0,
  use_sharp_yuv: 0,
}
-
AVIF (--avif [config])
{
  cqLevel: 33,
  cqAlphaLevel: -1,
  denoiseLevel: 0,
  tileColsLog2: 0,
  tileRowsLog2: 0,
  speed: 6,
  subsample: 1,
  chromaDeltaQ: false,
  sharpness: 0,
  tune: AVIFTune.auto,
}
-
JPEG-XL (--jxl [config])
{
  effort: 7,
  quality: 75,
  progressive: false,
  epf: -1,
  lossyPalette: false,
  decodingSpeedTier: 0,
  photonNoiseIso: 0,
  lossyModular: false,
}
-
WebP2 (--wp2 [config])
{
  quality: 75,
  alpha_quality: 75,
  effort: 5,
  pass: 1,
  sns: 50,
  uv_mode: UVMode.UVModeAuto,
  csp_type: Csp.kYCoCg,
  error_diffusion: 0,
  use_random_matrix: false,
}
-
OxiPNG (--oxipng [config])
{
  level: 2
}
-
Rotate (--rotate [config])
{
  numRotations: 0
}
Possible values: 1 for 90 degree, 2 for 180 degree, ...etc.
-
Resize (--resize [config])
{
  width: number,
  height: number,
  method: 'triangle' | 'catrom' | 'mitchell' | 'lanczos3',
  premultiply: true,
  linearRGB: true,
}
-
Quantize (--quant [config])
{
  numColors: 256,
  dither: 1.0,
}
注意: 並非所有 Squoosh 的功能都有對應到 Squoosh CLI 來,所以功能稍有缺陷。
相關連結