在 Visual Studio 2013 新版的 ASP.NET MVC 5 專案範本中已內建 ASP.NET Identity 機制,若要整合第三方驗證機制,除了內建的 Microsoft Account、Facebook、Twitter 與 Google 之外,要怎樣增加其他的驗證機制呢?本篇文章就用逐步教學的方式,示範如何在你的網站增加 GitHub OAuth2 驗證機制。
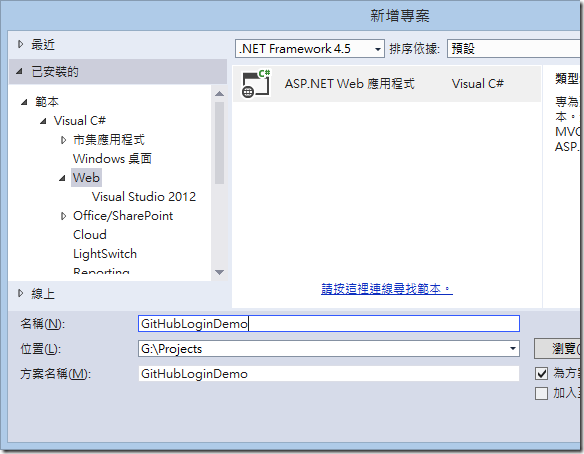
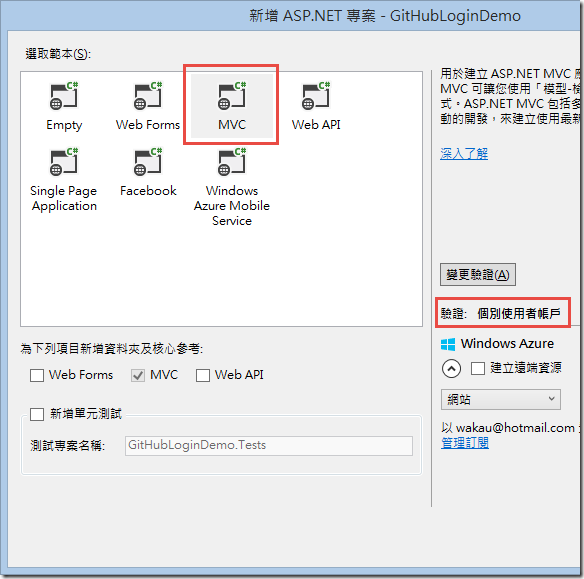
1. 建立ASP.NET MVC 5專案
2. 透過 NuGet 安裝 Owin.Security.Providers 套件
- Install-Package Owin.Security.Providers
3. 修改 App_Start\Startup.Auth.cs 檔案
var opt = new GitHubAuthenticationOptions();
opt.ClientId = "YOUR_GITHUB_CLIENTID";
opt.ClientSecret = "YOUR_GITHUB_CLIENTSECRET";
opt.Scope.Add("user");
opt.Scope.Add("repo");
opt.Scope.Add("public_repo");
opt.SignInAsAuthenticationType = DefaultAuthenticationTypes.ExternalCookie;
opt.Provider = new GitHubAuthenticationProvider()
{
    OnAuthenticated = async (context) =>
    {
        context.Identity.AddClaim(new System.Security.Claims.Claim("GitHubAccessToken", context.AccessToken));
    }
};

app.UseGitHubAuthentication(opt);
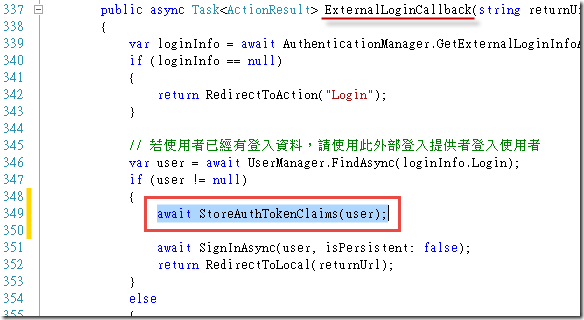
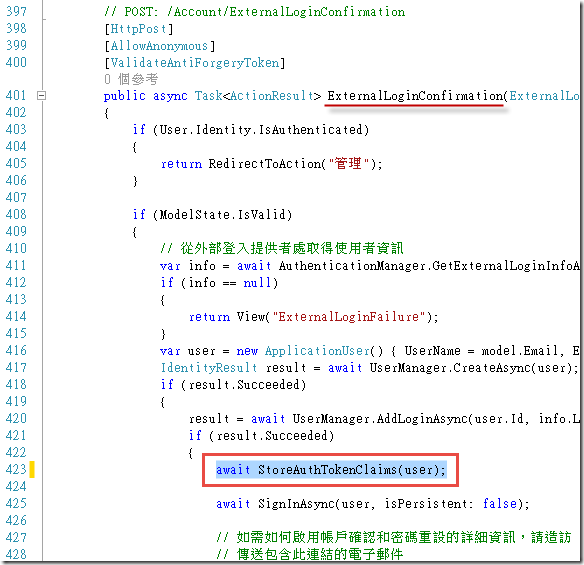
4. 修改 Controllers\AccountController.cs 檔案
新增一個 private 方法,程式碼如下:
private async Task StoreAuthTokenClaims(ApplicationUser user)
{
    // Get the claims identity
    ClaimsIdentity claimsIdentity =
        await AuthenticationManager.GetExternalIdentityAsync(DefaultAuthenticationTypes.ExternalCookie);

    if (claimsIdentity != null)
    {
        // Retrieve the existing claims
        var currentClaims = await UserManager.GetClaimsAsync(user.Id);

        // Get the list of access token related claims from the identity
        var tokenClaims = claimsIdentity.Claims.Where(c => c.Type == "GitHubAccessToken");

        // Save the access token related claims
        foreach (var tokenClaim in tokenClaims)
        {
            if (!currentClaims.Contains(tokenClaim))
            {
                await UserManager.AddClaimAsync(user.Id, tokenClaim);
            }
        }
    }
}
修改 ExternalLoginCallback / LinkLoginCallback / ExternalLoginConfirmation 這三個可能會用到儲存 Access Token 的動作方法,最主要是要把使用者透過登入取得的 Access Token 儲存到資料庫中,主要就是呼叫上列程式碼:
await StoreAuthTokenClaims(user);
備註:GitHub 的 OAuth2 驗證過程產生的 Access Token 並不會自動過期。
示意圖如下:

大功告成!
之後只要使用者登入,就可以自動用以下程式碼取得 GitHub Access Token:
Claim cGitHubAccessToken = ((ClaimsIdentity)User.Identity).FindFirst("GitHubAccessToken");
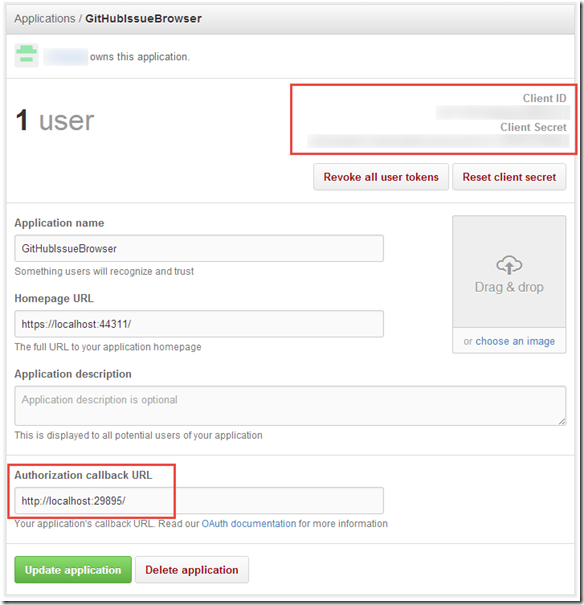
底下顯示 GitHub 上面註冊 Applications 的設定畫面,最主要你必須取得 Client ID 與 Client Secret 並寫入 App_Start\Startup.Auth.cs 檔案的 GitHub 設定,另一個則是你執行網站的網址必須註冊在 Authorization callback URL 欄位,一定要設定正確才能驗證成功!
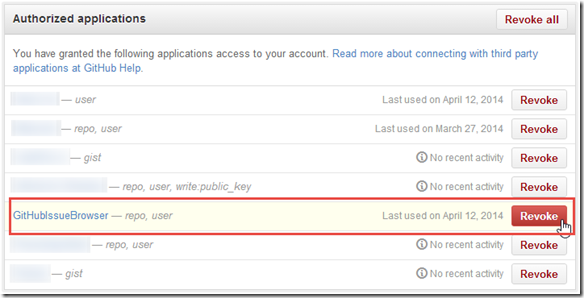
至於登入過的 GitHub 使用者,可以到 https://github.com/settings/applications 網址撤銷之前授權過的應用程式:
相關連結
各位也可以觀賞我之前錄製的影片:ASP NET MVC 5 新功能探索之《ASP.NET Identity》