若想將 ASP.NET 網站安裝至 Windows Containers 容器中,其實還算簡單,直接使用微軟官方提供的 mcr.microsoft.com/dotnet/framework/aspnet:4.8 容器映象就可以立即使用。但如果要另外安裝 SSL/TLS 憑證的話,那就顯的有點麻煩了,即便官方有提供簡易範例,但要調整為正式憑證的話,網路上似乎沒有完整的文章說明,本篇文章就來詳實記錄所有的技術細節。
建立容器
docker run --name=mysite --isolation=process -d -p 80:80 -p 443:443 -v C:\Projects\WebApplication1:C:\Inetpub\wwwroot mcr.microsoft.com/dotnet/framework/aspnet:4.8
以下對上述參數進行說明:
--name=mysite 設定容器好記名稱為 mysite,方便後續命令說明。--isolation=process 由於我們要複製現有的 PFX 憑證進容器,在 Windows 10 的 Windows Containers 必須要使用 proccess 隔離模式執行,才能執行 docker cp 命令複製檔案。-d 代表我們要將容器跑成 detach 模式。-p 80:80 -p 443:443 由於 Windows Containers 執行容器時,預設採用 nat 模式,所以需要將容器的 IP:Ports 對應到本機 Ports 比較方便測試。-v C:\Projects\WebApplication1:C:\Inetpub\wwwroot 將一個現有的 ASP.NET MVC 5 專案對應到容器的 C:\Inetpub\wwwroot 路徑。mcr.microsoft.com/dotnet/framework/aspnet:4.8 這是微軟官方的「多架構」容器映象。詳見 Windows Container 版本相容性與多重架構容器映像介紹 文章。
如果要進入容器,可以透過 docker exec 在容器中執行 PowerShell:
docker exec -it -w c:\inetpub\wwwroot mysite powershell
複製 PFX 憑證檔進容器
由於你在安裝 Git 的時候,就已經內建了 openssl.exe 工具,因此我們可以不用另外安裝 OpenSSL for Windows 工具。直接利用這個命令,透過現有的私密金鑰與網站憑證產生出 PFX (PKCS#12) 憑證檔。由於 PFX 憑證檔案被要求一定要設定密碼,因此你必須在建立 PFX 憑證檔時,輸入一組憑證密碼!
C:\> &'C:\Program Files\Git\usr\bin\openssl.exe' pkcs12 -export -out "certificate_combined.pfx" -inkey "private.key" -in "certificate.crt" -certfile ca_bundle.crt
Enter Export Password:
Verifying - Enter Export Password:
接著,我們就直接將 certificate_combined.pfx 複製到容器內:
docker cp "C:\certificate_combined.pfx" mysite:c:\certificate_combined.pfx
從容器匯入 PFX 憑證到 Windows 的憑證儲存區(Certificate Store)
由於要在 IIS 綁定 SSL/TLS 憑證,必須先將 PFX 憑證匯入到系統中,此時最需要知道的,就是到底要匯入到哪裡去!
你可以在 Windows PowerShell 輸入 dir cert:\ 得知 Windows 預設有兩個憑證儲存區 (CurrentUser / LocalMachine):
Location   : CurrentUser
StoreNames : {TrustedPublisher, ClientAuthIssuer, Root, UserDS...}

Location   : LocalMachine
StoreNames : {TestSignRoot, ClientAuthIssuer, Remote Desktop, Root...}
IIS 是系統服務,因此我們肯定要匯入到 LocalMachine (本機電腦) 這裡!
如果你在 Windows PowerShell 輸入 dir cert:\LocalMachine\ 則會列出本機電腦所有的憑證儲存區:
Name : TestSignRoot

Name : ClientAuthIssuer

Name : Remote Desktop

Name : Root

Name : TrustedDevices

Name : CA

Name : TrustedAppRoot

Name : eSIM Certification Authorities

Name : AuthRoot

Name : Windows Live ID Token Issuer

Name : TrustedPublisher

Name : AAD Token Issuer

Name : FlightRoot

Name : TrustedPeople

Name : Local NonRemovable Certificates

Name : My

Name : SmartCardRoot

Name : Trust

Name : Disallowed

Name : Homegroup Machine Certificates
這邊與 IIS 有關的儲存區其實只有三個,分別是:
My 代表著「個人」(Personal)Root 代表著「受信任的根憑證授權單位」(Trusted Root Certification Authorities)CA 代表著「中繼憑證授權機構」(Intermediate Certification Authorities)
依據你所購買的憑證而定,通常你只需要匯入到「個人」憑證區就好,有時候還需要額外匯入額外的憑證到「中繼憑證授權機構」中!
在認識「憑證儲存區」的觀念後,接下來就要匯入憑證了。
如果不想匯入預先申請好的憑證,而要用自簽憑證的話,可以用一個命令快速建立完成:$cert = New-SelfSignedCertificate -DnsName blog.miniasp.com -CertStoreLocation cert:\LocalMachine\My
由於讀取 PFX 憑證需要輸入「密碼」,使用 Windows PowerShell 命令且需要用到密碼時,有兩種不同的使用方式來存取密碼:
-
半自動的作法(需手動輸入密碼)(較為安全)
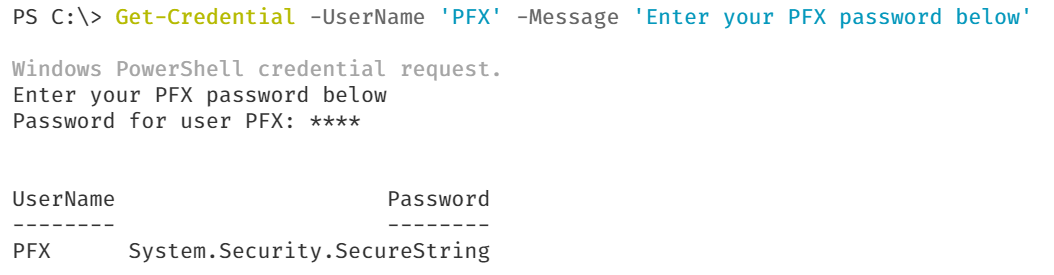
$PfxPW = Get-Credential -UserName 'PFX' -Message 'Enter your PFX password below'
$cert = Import-PfxCertificate -FilePath C:\certificate_combined.pfx -CertStoreLocation cert:\LocalMachine\My -Password $PfxPW
這裡的 Get-Credential 命令,預設會開啟一個視窗,讓你輸入密碼:
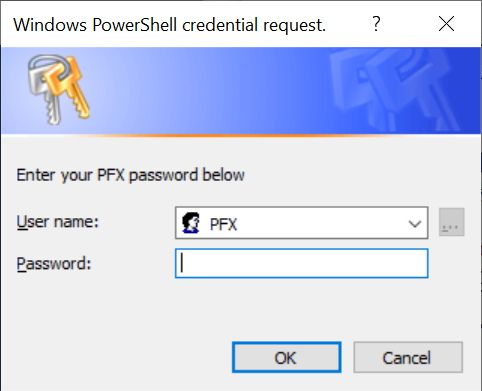
不過在 Windows Containers 的容器內,並無法顯示任何 GUI 視窗,因此你可以透過以下命令,調整系統機碼設定,讓輸入密碼的動作直接在終端機介面中完成:
Set-ItemProperty "HKLM:\SOFTWARE\Microsoft\PowerShell\1\ShellIds" ConsolePrompting True
完整的命令如下:
Set-ItemProperty "HKLM:\SOFTWARE\Microsoft\PowerShell\1\ShellIds" ConsolePrompting True
$PfxPW = Get-Credential -UserName 'PFX' -Message 'Enter your PFX password below'
$cert = Import-PfxCertificate -FilePath C:\certificate_combined.pfx -CertStoreLocation cert:\LocalMachine\My -Password $PfxPW
-
全自動的作法(密碼會出現在腳本中)(較不安全)
這種作法則是直接利用 ConvertTo-SecureString Cmdlet 將明碼轉為「安全密碼」物件,這樣也可以直接傳入 Import-PfxCertificate Cmdlet 命令中。
$PfxPW = ConvertTo-SecureString -String "1234" -Force -AsPlainText
$cert = Import-PfxCertificate -FilePath C:\certificate_combined.pfx -CertStoreLocation cert:\LocalMachine\My -Password $PfxPW
如果你想透過 Dockerfile 自動建置的話,那就必須要用這種方式匯入 PFX 憑證。
當上述 Import-PfxCertificate 命令成功匯入憑證後,你會將憑證資訊都儲存在 $cert 變數中。你也可以輸入 $cert 顯示以下資訊:
PS C:\> $cert

   PSParentPath: Microsoft.PowerShell.Security\Certificate::LocalMachine\My

Thumbprint                                Subject
----------                                -------
BF92E6FEDF8295AFD7D32FBA59DF6845255CB22B  CN=blog.miniasp.com
如果你的 PFX 憑證老早就匯入了,也可透過 dir cert:\LocalMachine\My 命令查詢有哪些憑證存放在 cert:\LocalMachine\My 憑證儲存區中,記錄下 Thumbprint 資訊,然後透過以下命令取得憑證物件:
$cert = Get-Item cert:\LocalMachine\My\BF92E6FEDF8295AFD7D32FBA59DF6845255CB22B
其中 BF92E6FEDF8295AFD7D32FBA59DF6845255CB22B 即為憑證指紋資訊。
如果你想透過已知的 Subject (憑證主體名稱) 來取得憑證,可以使用命令:
$cert = Get-ChildItem Cert:\LocalMachine\My\ | Where-Object { $_.Subject -eq 'CN=blog.miniasp.com' }
如果你想透過已知的 FriendlyName (憑證好記名稱) 來取得憑證,可以使用命令:
$cert = Get-ChildItem Cert:\LocalMachine\My\ | Where-Object { $_.FriendlyName -eq 'The Will Will Web' }
替 IIS 站台綁定憑證
當你可以透過 $cert 取得憑證資訊,接下來就是使用 IIS 內建的 IISAdministration 模組,透過 PowerShell 修改 IIS 設定。
Import-Module IISAdministration; `
$certHash = $cert.GetCertHash(); `
$sm = Get-IISServerManager; `
$sm.Sites["Default Web Site"].Bindings.Add("*:443:blog.miniasp.com", $certHash, "My", "SNI"); `
$sm.CommitChanges();
以下是上述命令的說明:
- 只要你的電腦有安裝 IIS 服務,就可以成功匯入 IISAdministration 模組。
- 要在 IIS 站台綁定(Binding)憑證,必須先取得憑證的 hash 資訊,你可以透過
$cert.GetCertHash() 取得
- 這個 Get-IISServerManager 可以取回一個 ServerManager 物件,你可以用這個物件來管理所有 IIS 設定!
- 你可以透過
$sm.Sites["Default Web Site"] 取得特定站台的 Site 物件。再透過 Site.Bindings 屬性來取得 BindingCollection 集合。我們這裡使用的是 Add(String, Byte[], String, SslFlags) 這個方法(Method),新增一個 SNI SSL 的綁定。
使用 ServerManager 物件來管理 IIS 設定有個優點,就是你可以一次套用多個設定,並且在最後一次儲存,如果有發生任何問題,所有設定會批次復原(Rollback),使用上比較安全。
如果你已經知道憑證指紋資訊的話,也可以直接透過 New-IISSiteBinding 新增站台繫結(Binding):
Import-Module IISAdministration; `
New-IISSiteBinding -Name "Default Web Site" -Protocol https -BindingInformation "*:443:blog.miniasp.com" -SslFlag Sni -CertificateThumbPrint $cert.Thumbprint -CertStoreLocation My
請注意:如果你希望在一個容器中安裝多張 SSL 憑證,就一定要加上 -SslFlag Sni 參數,否則是可以省略的。
建立完成後,可以透過 Get-IISSite 取得目前所有站台的設定:
PS C:\> Get-IISSite

Name             ID   State      Physical Path                  Bindings
----             --   -----      -------------                  --------
Default Web Site 1    Started    %SystemDrive%\inetpub\wwwroot  http *:80:
                                                                https *:443:blog.miniasp.com sslFlags=Sni
如果想要移除 SSL 綁定的話,可以使用以下命令:
Remove-IISSiteBinding -Name "Default Web Site" -Protocol https -BindingInformation "*:443:blog.miniasp.com" -Confirm:$False
建立 Dockerfile 自動化所有流程
以下是完整的 Dockerfile 範例:
# escape=`
FROM mcr.microsoft.com/dotnet/framework/aspnet:4.8

ENV hostname blog.miniasp.com
ENV pfxpw 1234

WORKDIR /inetpub/wwwroot

COPY certificate_combined.pfx /certificate_combined.pfx

COPY WebApplication1/WebApplication1/. .

SHELL [ "powershell" ]

RUN Import-Module IISAdministration; `
    $PfxPW = ConvertTo-SecureString -String \"${env:pfxpw}\" -Force -AsPlainText; `
    $cert = Import-PfxCertificate -FilePath C:\certificate_combined.pfx -CertStoreLocation cert:\LocalMachine\My -Password $PfxPW; `
    Remove-Item C:\certificate_combined.pfx; `
    New-IISSiteBinding -Name \"Default Web Site\" -Protocol https -BindingInformation \"*:443:${env:hostname}\" -CertificateThumbPrint $cert.Thumbprint -CertStoreLocation My

EXPOSE 80
EXPOSE 443
重點提醒:
- 由於 Dockerfile 預設跳脫字元為
\,這點對 Windows 平台的用戶很不友善,因為路徑分隔預設就是 \ 符號,這樣會讓檔案中所有路徑都需要用 \\ 才能代表一個 \ 符號。因此第一行的 # escape=` 用來宣告 Dockerfile 的跳脫字元為 `。除了改善路徑表示之外,因為 Dockerfile 允許一個命令擴展到多行,使用的語法預設也是 \ 符號,當調整過去後,就可以用 ` 符號放在該行最後一個字元,這樣也可以讓 Dockerfile 中的 RUN 命令,看起來更像 PowerShell 命令,因為 PowerShell 預設的換行跳脫字元就是 ` 符號,這對習慣寫 PowerShell 的人來說,語法會比較自然些。
- 這份 Dockerfile 的環境變數,到了
RUN 執行的時候,若要讀取 hostname 環境變數,必須用 $env:hostname 或 ${env:hostname} 這樣的語法才可以讀到。
建置容器映象:
docker build -t myiis .
執行容器:
docker run --rm --name=mysite --isolation=process -d -p 80:80 -p 443:443 myiis
如此一來,你就可以在本機以 http://localhost 與 https://localhost 進行連線了!
注意 HTTPS 安全連線
如果你嘗試連到 https://localhost/ 網址,肯定會遭遇 NET::ERR_CERT_COMMON_NAME_INVALID 連線問題。以我上述範例來說,我所安裝的憑證主體名稱為 blog.miniasp.com,而且我的 IIS 繫結到的域名也是 blog.miniasp.com,因此無論如何你是無法用 https://localhost 連接到容器中的網站。這時候請參考我的 手動設定網址對應 IP 的方式 ( 主機 IP 域名對應檔 hosts) 文章進行設定,讓你的本機電腦可以順利連到容器中的 HTTPS 網站。
相關連結