今天我嘗試把 GitLab 安裝到我的 Ubuntu 22.04 LTS 作業系統中,過程頗為順利,安裝體驗還不錯,我也特別記錄下完整的安裝設定過程,並透過這篇文章分享。

使用 Multipass 準備 Ubuntu 22.04 LTS 環境
大致的建立步驟如下:
# 指定 LANBridge 為我橋接網路的的虛擬交換器
multipass set local.bridged-network=LANBridge

# 啟動 VM 並使用手動指派 IP 地址 (硬碟不能給太少)
multipass launch --name 'gitlab' --bridged --network "name=LANBridge,mode=manual" --disk 50G --cpus 4 --memory 4G

# 查看目前 IP 地址
multipass exec 'gitlab' -- ip -br address show scope global

# 修正網路設定,指派固定 IP 地址
multipass exec 'gitlab' -- sudo vi /etc/netplan/50-cloud-init.yaml

# 重開機並取得固定 IP 地址
multipass exec 'gitlab' -- sudo reboot

# 查看目前 IP 地址
multipass exec 'gitlab' -- ip -br address show scope global

# 進入 VM
multipass shell 'gitlab'
詳細建立過程請參考 如何替 Multipass 建立的 VM 設定一組固定 IP 地址 文章說明。
初始化安裝 GitLab
-
安裝必要套件
sudo apt install ca-certificates curl openssh-server postfix tzdata perl -y
-
開始安裝 GitLab
cd /tmp
curl -LO https://packages.gitlab.com/install/repositories/gitlab/gitlab-ce/script.deb.sh
sudo bash /tmp/script.deb.sh
sudo apt install gitlab-ce
這個過程會自動安裝 PostgreSQL 起來,完全不用手動安裝設定,預設資料檔在 /var/opt/gitlab/postgresql/data/ 目錄。詳見 Database settings | GitLab 文件說明。
-
設定防火牆
sudo ufw status

sudo ufw allow http
sudo ufw allow https
sudo ufw allow OpenSSH

sudo ufw enable
sudo ufw status
-
調整 GitLab Configuration File
編輯 /etc/gitlab/gitlab.rb 檔案
sudo vi /etc/gitlab/gitlab.rb
調整 external_url 參數為你的 GitLab 網址,如果網址是 https:// 開頭且為外部網址的話,還會自動透過 Let's Encrypt 幫你申請一個免費憑證!
external_url 'http://192.168.1.102'
-
調整 SMTP 發信設定
編輯 /etc/gitlab/gitlab.rb 檔案
sudo vi /etc/gitlab/gitlab.rb
由於發信設定非常複雜,建議參考 smtp.md 這份文件來進行設定,我的 SendGrid 就是參考這份設定成功的!👍
gitlab_rails['smtp_enable'] = true
gitlab_rails['smtp_address'] = "smtp.sendgrid.net"
gitlab_rails['smtp_port'] = 587
gitlab_rails['smtp_user_name'] = "apikey"
gitlab_rails['smtp_password'] = "SG.**********"
gitlab_rails['smtp_domain'] = "smtp.sendgrid.net"
gitlab_rails['smtp_authentication'] = "login"
gitlab_rails['smtp_enable_starttls_auto'] = true
gitlab_rails['smtp_tls'] = false

gitlab_rails['gitlab_email_from'] = 'gitlab@example.com'
gitlab_rails['gitlab_email_display_name'] = 'GitLab'
gitlab_rails['gitlab_email_reply_to'] = 'gitlab@example.com'
-
重新設定 GitLab
任何時候修改了 /etc/gitlab/gitlab.rb 檔案,就要執行這個命令重新套用新的設定:
sudo gitlab-ctl reconfigure
此命令執行完後 GitLab 會自動重新啟動,你大約等 30 秒左右就可以使用網站了。
從 Web 介面初始化設定 GitLab
-
開啟 GitLab 管理介面,我這裡是 http://192.168.1.102
登入帳號為 root,密碼則是寫在主機的 /etc/gitlab/initial_root_password 檔案中。
sudo cat /etc/gitlab/initial_root_password
注意:此密碼只能在 24 小時內使用!
# WARNING: This value is valid only in the following conditions
#          1. If provided manually (either via `GITLAB_ROOT_PASSWORD` environment variable or via `gitlab_rails['initial_root_password']` setting in `gitlab.rb`, it was provided before database was seeded for the first time (usually, the first reconfigure run).
#          2. Password hasn't been changed manually, either via UI or via command line.
#
#          If the password shown here doesn't work, you must reset the admin password following https://docs.gitlab.com/ee/security/reset_user_password.html#reset-your-root-password.

Password: BKovCkQOzjffKJn2GuI1bGZPHUe8v0ugnTWPJJCgbN4=

# NOTE: This file will be automatically deleted in the first reconfigure run after 24 hours.
-
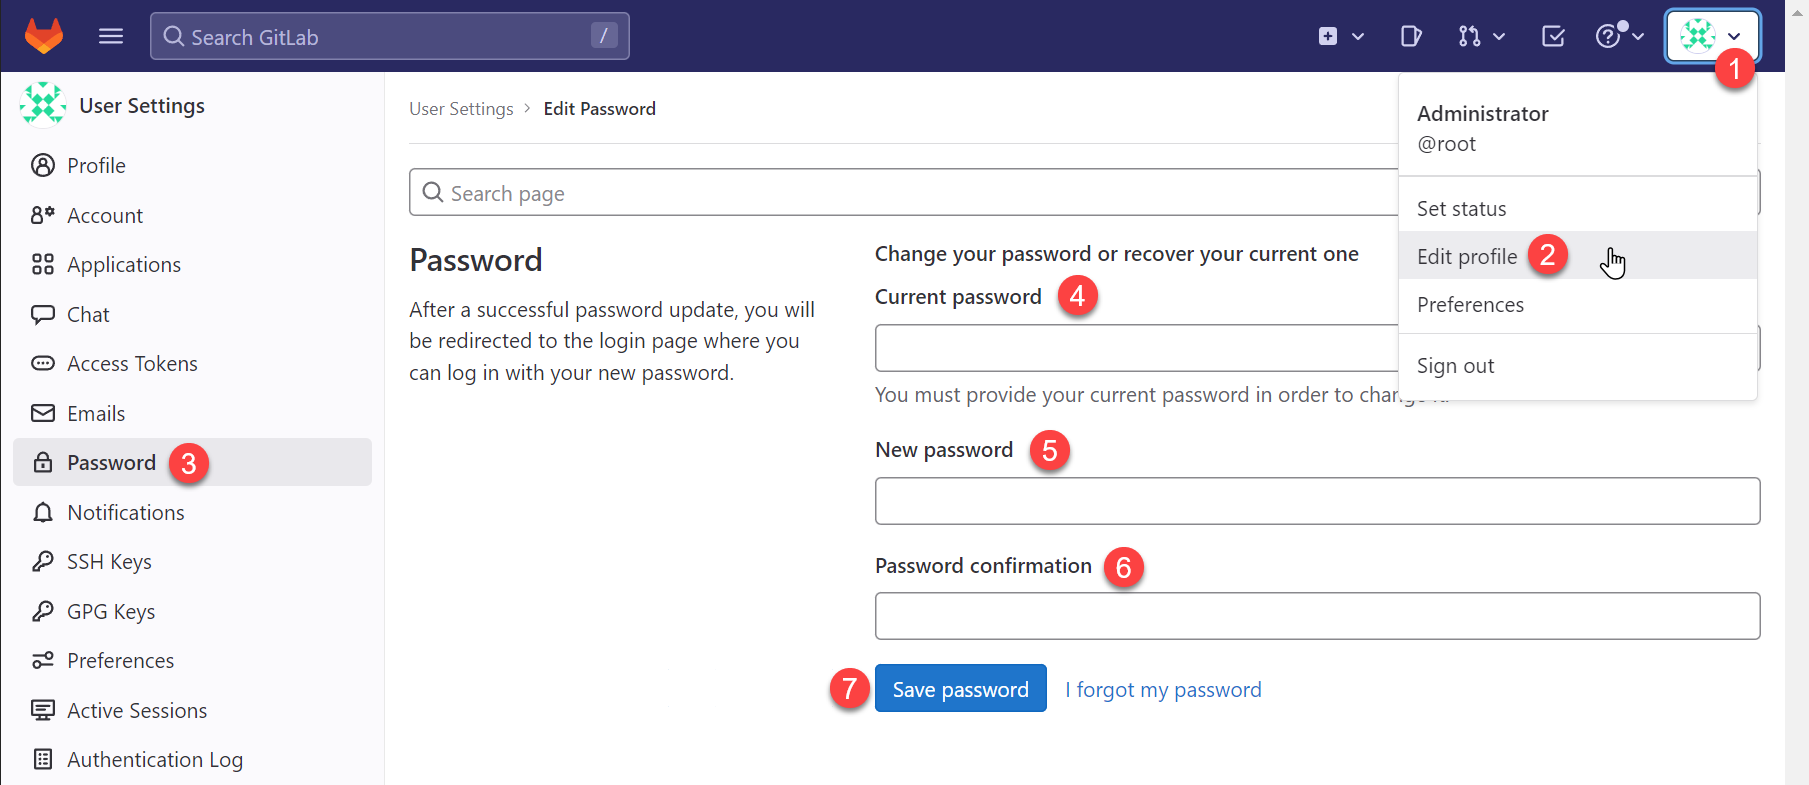
更新 root 帳號密碼
-
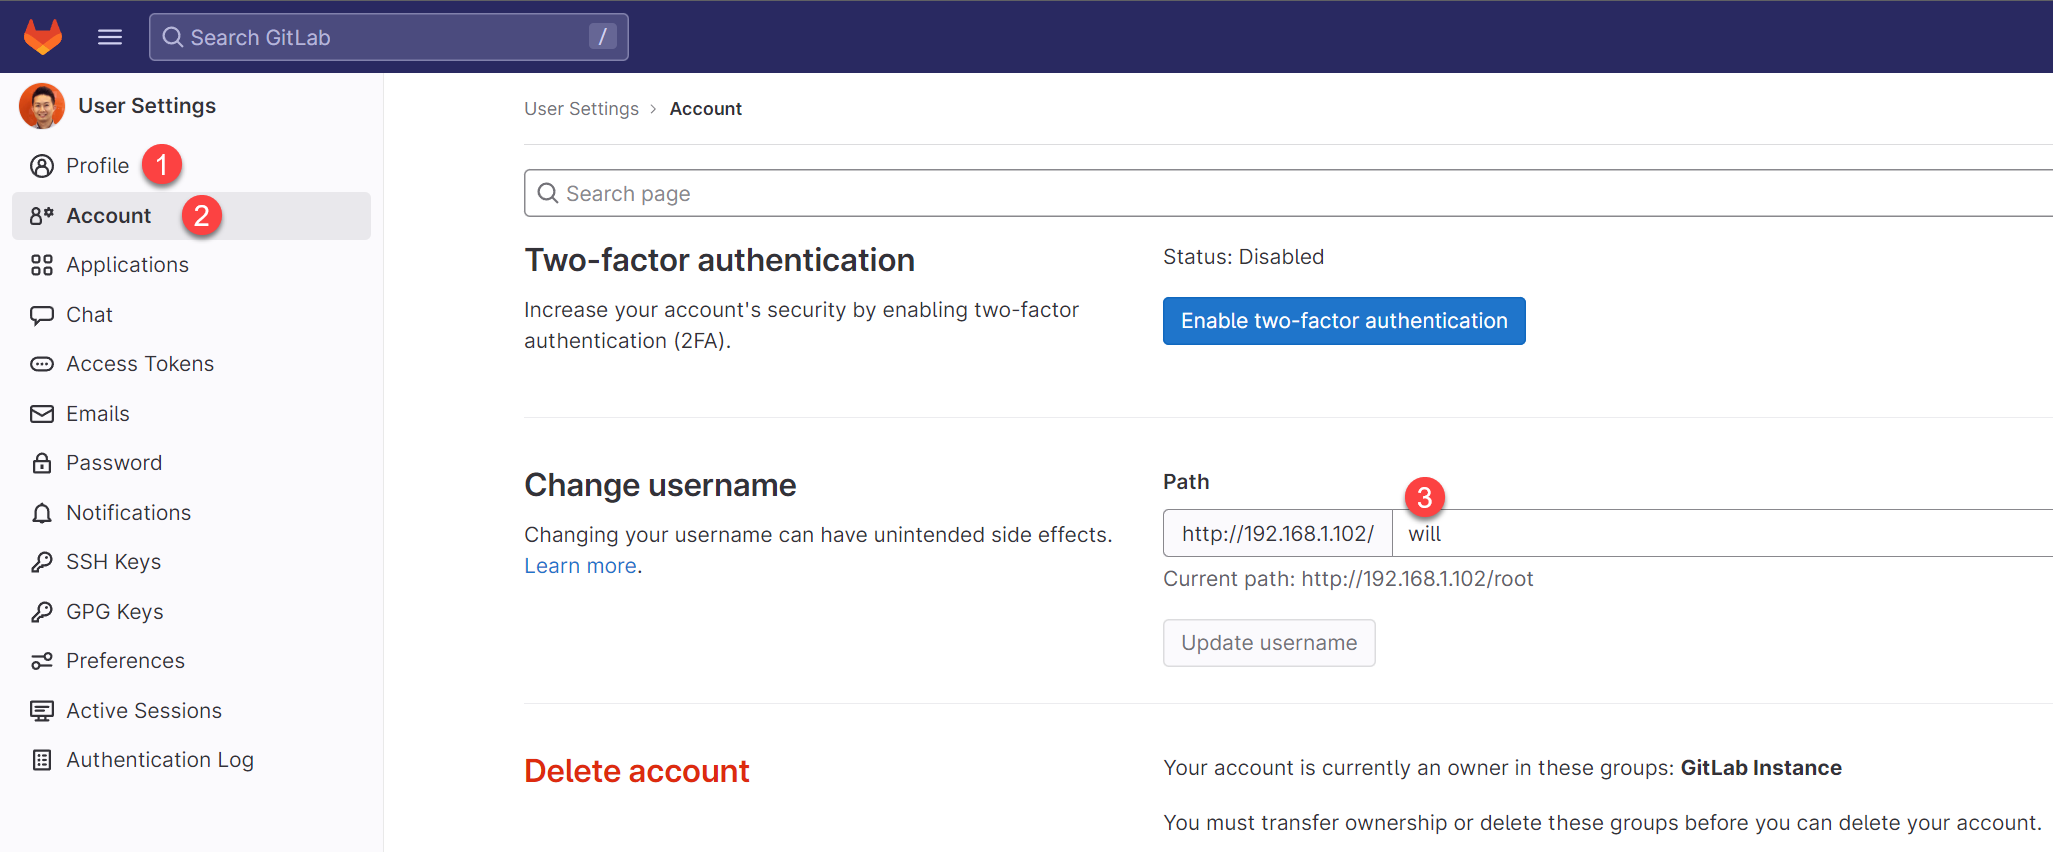
[Edit Profile] > 更新 Profile 與 Account 設定
更新個人資料與帳號名稱,建議將使用者名稱 root 改成其他名稱,提高帳號安全性。
-
[Edit Profile] > 更新 SSH Keys 設定
通常個人的 SSH 公開金鑰都放在 ~/.ssh/id_rsa.pub 路徑中,以下命令在 Bash 與 Windows PowerShell 都適用:
cat ~/.ssh/id_rsa.pub
如果沒有建立過金鑰的話,可以透過 ssh-keygen 快速建立金鑰:
ssh-keygen -t rsa -b 4096 -f $HOME/.ssh/id_rsa -P ""
-
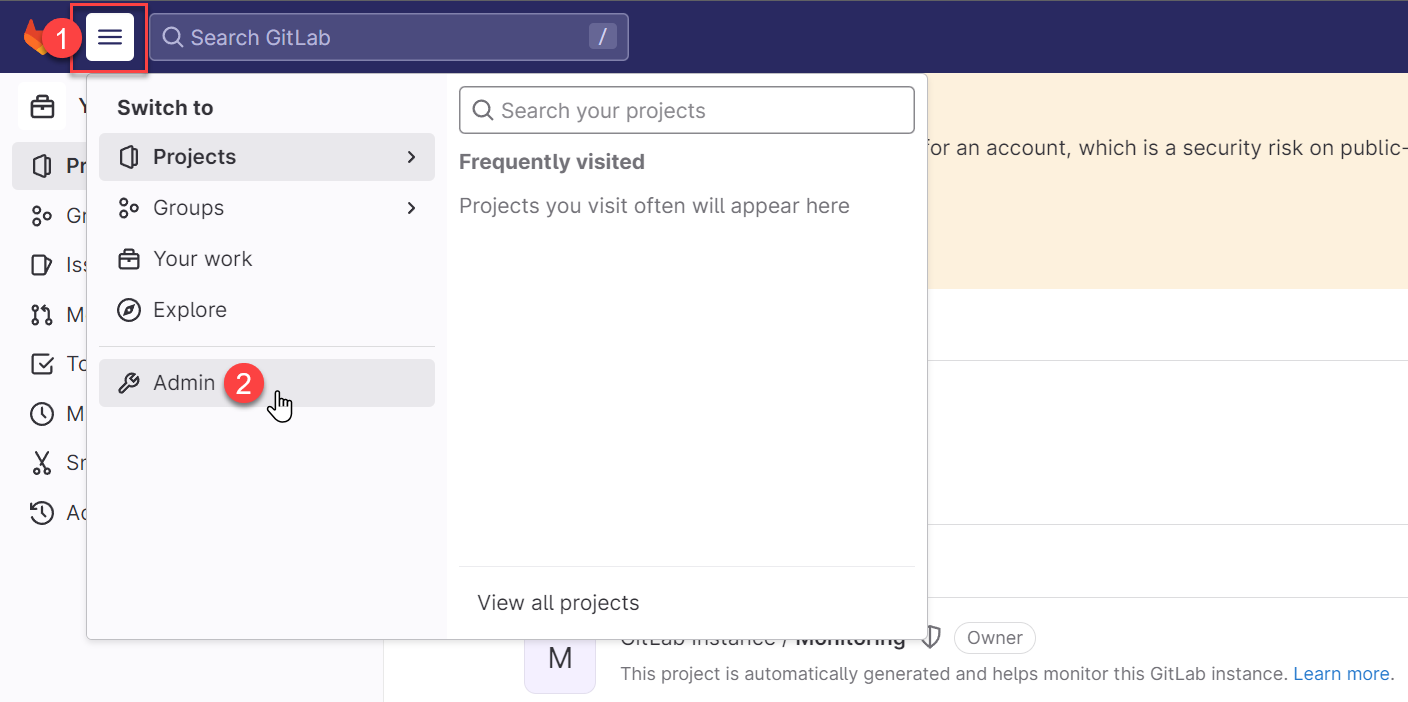
[Admin] > [Settings] > [General] > Sign-up restrictions
GitLab 的 Admin 頁面藏在頁面左上角的漢堡選單中:
公司內部使用建議可以停用「註冊帳號」功能:
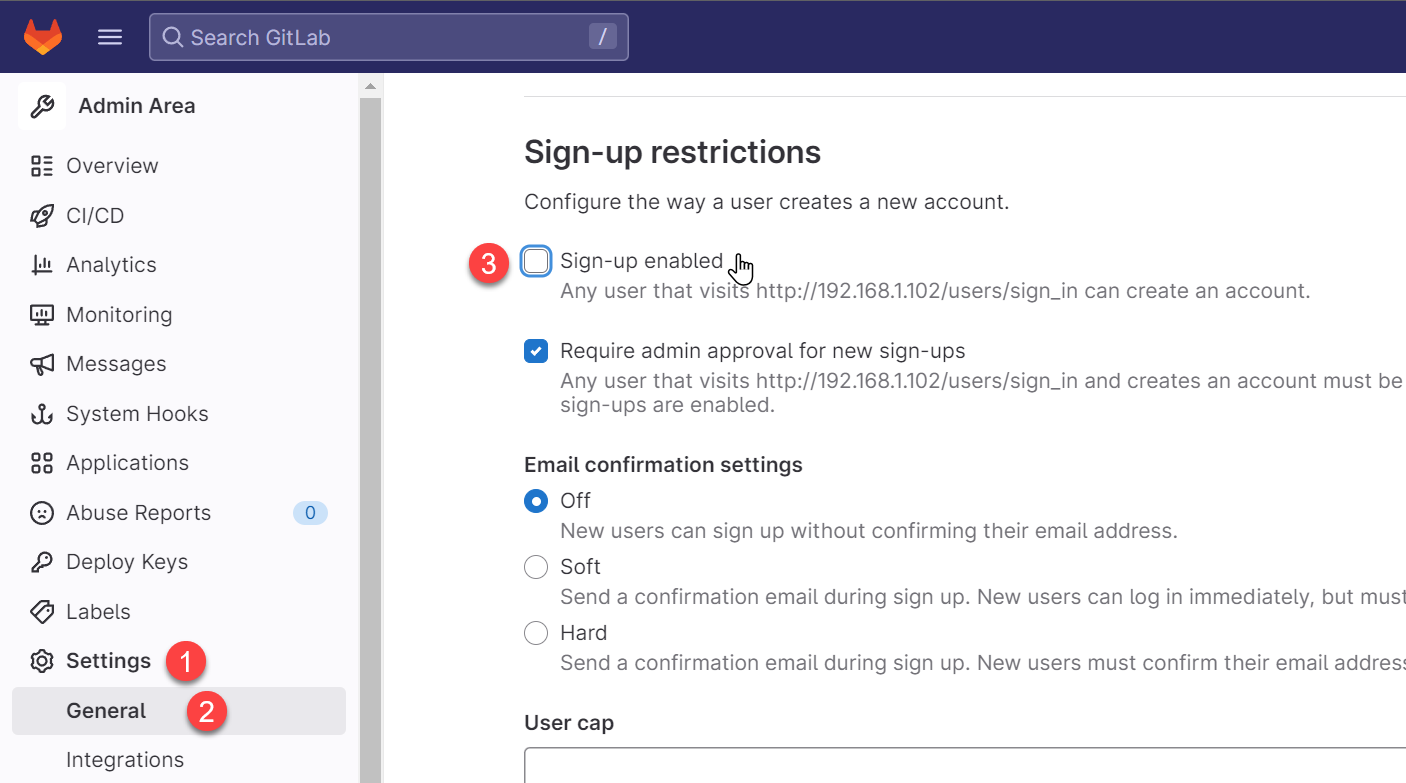
如果要開放註冊帳號功能,也建議可以加入 E-mail 域名檢查:
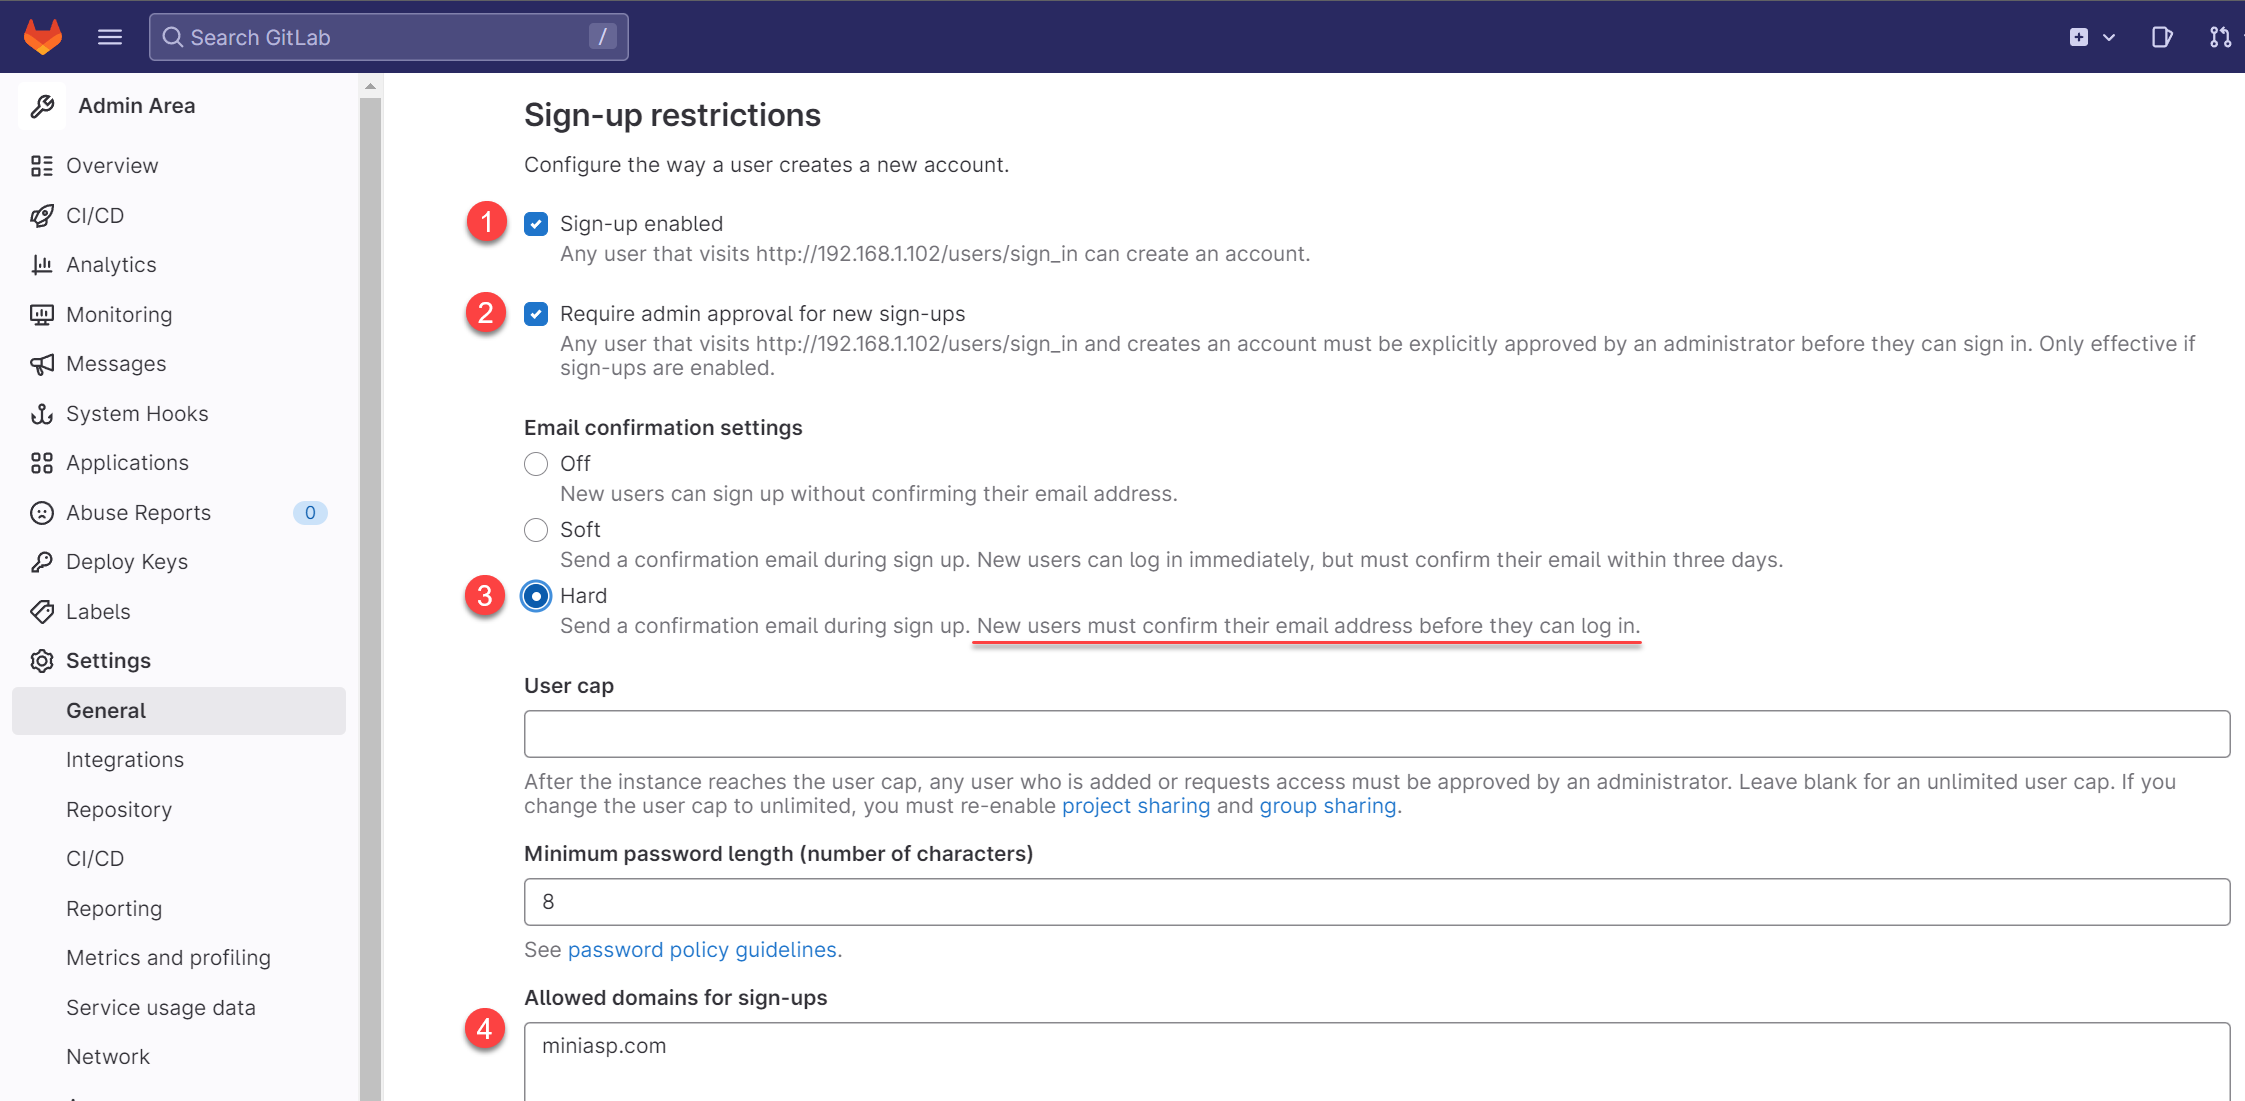
最後,務必記得按下 Save changes 按鈕,變更的設定才會生效!
-
[Admin] > [Settings] > [General] > Account and limit
如果你不希望大家都可以建立專案,可以將 Default projects limit 設定為 0。

最後,務必記得按下 Save changes 按鈕,變更的設定才會生效!
相關連結